


Among The Mountains
Mardi Himal Trekking Guide & Itinerary
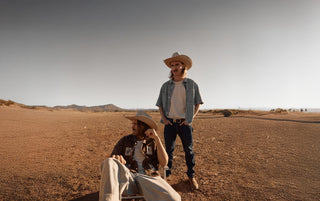
By Mon Barton
QUICK GUIDE
Duration: 4 days Highest Alt: 4500m Seasons: March Accommodation: Shared Teahouses Start Point: Pitam Deurali End point: Siding Level of Difficulty: Medium Daily costs Per Person: $45 AUD approx. Over ll costs Per Person: $370 AUD approx.
Intro
Trekking through, amongst and around the Himalayas is at it’s peak (literally) and with growing numbers of keen trekkers and adventurous types, there’s no better time than now to step foot onto a Nepalese trail and see those big snow capped beauties for yourself! If you’ve been on the fence about taking that dream trip to Nepal or just love a challenge then Mardi Himal is seriously for you! We arrived in Kathmandu, Nepal early March and headed straight for Pokhara to begin a separate project, only to realise that Pokhara is the perfect starting point for many treks around the area.
As total newbies to mountains, snow trekking, and long, long walks, we were lacking in both experience and knowledge as to what trek was going to suit us and like any great adventure, there is a lot to factor in. If it’s not making a gear list, then you’re calculating the days, the costs and wondering if you’re legs will even carry you all the way up! But we were really lucky to have our friend (a local Nepalese) point us in the direction of the Mardi Himal Base Camp trek and decided to join us. We had no idea what to expect but to our delight Mardi is one of the least trekked trails of this region, making it a little more untouched, quiet and preserved than the ever popular Annapurna/Everest base camp, Ghorepani and Poonhill treks. It was one of the greatest challenges I’ve faced despite it only being 4 days in length.
But with great challenge comes great reward and to be standing amongst the tallest mountains, you can't help but feel an infinite feeling of pride wash over you, because you’ve achieved something that felt a little impossible a few days prior. When your legs are aching, your mind is telling you to stop and turn back, your heart tells you to keep going, and so you do. But, we won't give away too much because we think you should experience it for yourself. Instead, enjoy this trekking guide we’ve created as an insight to each element of the trek for anyone who, like us, has little experience but a thirst for adventure and challenge!

Itinerary
Day 1 – Pokhara to Pitam Deurali (2 hours) By Jeep · Highest Alt 2100m
*Option to begin trekking from Dhampus instead. This will add an extra day.
Day 2 – Pitam Deurali to Low Camp (6 hours) Trekking Highest Alt 2970m 1h lunch in Forest Camp
*Option to stop at Forest Camp for the night. This will add an extra day.
Day 3 – Low Camp to High Camp (3 hours) Trekking Highest Alt 3550m
*Really big day, super steep terrain.
Day 4 – High Camp to View Point to Pokhara (12 hours) Trekking Highest Alt 4100-4500m
1) High camp to either: Lower View point, Upper View Point or Base Camp.
2) Any option back down to High Camp for Breakfast
3) High Camp to Low Camp for lunch
4) Low Camp to Siding
5) Siding to Pokhara by Jeep
*Base camp was closed due to too much snow. *Option to stay at Low Camp for the night *This was a HUGE day going down. We regretted not staying in Low Camp for the night.

Price breakdown in AUD
Per day: Porter = $25 · Guide = $25 · Food = $17-$20 (per person) · Teahouse accom = $5-$8
Additional costs: Permits = $50 (per person) · Jeep to Deurali = $70 · Jeep to Pokhara = $55
Trekking Gear (approx. due to bargaining): Sleeping bag hire = $1.50 per day · Walking poles = $12 · Puffer Jacket = $20 · Zip off pants = $10 · Crampons = $12

What you’ll need
Permits: TIMS & Annapurna conservation area.
Porter/Guide: We strongly advise a Guide for this trek as the trail is not clear at times and they will advise you of dangerous conditions ahead. A porter may not be necessary depending on how much you want to carry on yourself, however, keep in mind the weight and size of your day pack along with all your extra gear added on top if you choose not to have a porter.
Cash: Make sure you have enough cash for the whole trek on you, as there are no ATM’s available along the trek.
Snacks: We took Chocolate, Biscuits, Pringles, Nuts, Fruit.
Daypack: Map, Rain jacket, Camera, Phone, Tissues/Toilet Paper, Hand sanitiser, Comprehensive first aid kit, Walking poles, 2x 1L Water bottle or camel back, Water treatment tablets or SteriPen, Snacks, Cash/Passport/Permits, Gloves, Crampons, Will & Bear Beanie, Will & Bear Hat, Sunscreen, Lip-balm, Sunglasses.

Main pack (porter carries): 1x Zip off pants (these double as shorts!), 1x Leggings/lightweight pants, 1x Thermal top & bottoms , 1x Head torch, 2x Hiking socks, 1x Bed socks, 2x T-shirts, 1x Long sleeve shirt, 1x Puffer jacket or fleece jacket, 1x Shoes to wear at night (sandals/slides), 4x Underwear/sports bra, 1x Scarf, 1x Toiletries, 1x Sleeping bag, 1x Book/journal/cards, 1x Pack of batteries, 1x Power point converter/adapter.
What to expect
Purchasing trekking gear: Pokhara and Kathmandu have everything you need for trekking in any climate or terrain. From crampons to sleeping bags, walking poles and daypacks they’ve got it all. We do admit, the quality of gear in Nepal isn’t of the brands you’ll find at home; however, buying gear in Nepal means a fraction of the price and a lot more room in your luggage on the way over. When you’re finished trekking, you can donate your unwanted gear to Karma Flights, travel agencies or gift it to your porter/guide.
Food: An extensive menu of Western and Traditional Nepali food is on offer at every stop on this trek. We were very surprised to see such a great menu in such remote places. We advise steering clear of meat and most dairies. We did have cheese omelettes but stuck to vegetarian dishes for lunch and dinner.


Amenities: Shared squat toilets & showers (usually cold unless you pay). Filtered drinking water available but we suggest to treat ALL water with iodine tablets or a Steri Pen.
Terrain/View: A beautiful, thick forest trail winds and weaves its way through tree roots and blossoming rhododendron trees with steep sections of small ‘natural’ steps. You’ll finally pop out of the forest after trekking high enough that trees stop growing and perfect views of Mt Annapurna, Mt Hiunchuli, Mt Dhaulagiri, Mt Fishtail (Macchapucchre), etc.
Altitude sickness: Go slow! Don’t rush the trek even if you feel fit and able. Going up too high too fast can cause serious trouble and leave you with the nasty effects of AMS (acute mountain sickness). If you notice dizziness, headache, sudden nausea, and vomiting, make your way back down to a lower altitude and take a day to rest and acclimatise.


