


Hat Storage Solutions: DIY Hat Stand
How to Make a DIY Hat Stand: A Simple & Stylish Storage Solution
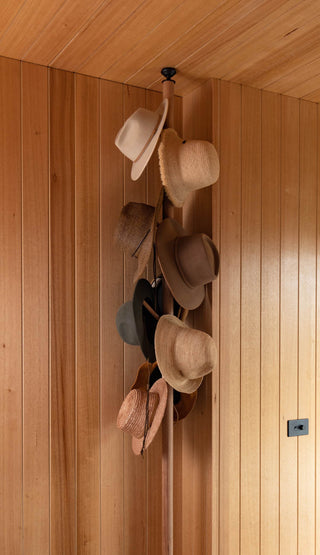
Are your hats piling up with nowhere to go? A DIY hat stand is the perfect way to keep your collection organised while adding a stylish touch to your space. In this guide, our friends from AL & IMO will show you how to make a functional and aesthetic hat rack using simple materials. Whether you're looking for an entryway organiser or a creative way to display your hats, this project is for you!
DIY with ALMO
DIY Hat Stand

DIY with ALMO
DIY Hat Stand
Materials Needed:
- Wooden base (circular or square, depending on design preference)
- Drill and drill bits
- Wood glue or screws
- Sandpaper (for smoothing edges)
- Measuring tape
- Pencil
- Wood stain or paint (optional)


Step 1: Plan Your Design
Decide how many hats you want your stand to hold. A taller design works well for larger collections, while a smaller, tabletop version is great for limited space. Sketch out your design to determine how many dowels you’ll need and their spacing.
Step 2: Prepare the Base
Using your chosen wooden base, mark the spots where each dowel will be inserted. Ensure even spacing so the stand remains balanced. If you're making a freestanding floor model, a wider base will provide better stability.
Step 3: Drill the Holes
Drill holes into the marked spots on your base. The size of the holes should match the diameter of your dowels for a snug fit. If using screws instead of glue, pre-drill pilot holes to prevent wood from splitting.
Step 4: Assemble the Hat Stand
Insert the wooden dowels into the holes. Apply wood glue for a strong bond, or secure them with screws from underneath. Allow the glue to dry completely before moving to the next step.
Step 5: Sand and Finish
Use sandpaper to smooth any rough edges. If desired, apply a wood stain or paint to match your decor. Let it dry completely before adding hats.
Step 6: Display Your Hats
Once your DIY hat stand is ready, arrange your hats in a way that showcases their shape and style. Place it in your entryway, bedroom, or closet for easy access and a stylish storage solution.
DIY Hat Rack Collection
Get your hat rack started today with our best selling hats


In Summary
Creating a DIY hat stand is an easy and rewarding project that helps keep your space tidy while adding a touch of design flair. Whether you're a hat enthusiast or just need better organization, this project is a fun way to show off your collection!
Thanks for your friends at AL & IMO for sharing this DIY with us. To see more of what these legends do go to: https://alandimo.com.au/
